PLASTIC-FREE LIVING
5 Eco-Friendly Crafts To Entertain The Kids At Home
Written by Natalie Henderson, Marketing @blueland
Published: April 22, 2020
Updated: June 26, 2025

It can be hard to stay home. At some point, we all get cabin fever and it’s tough not being able to go out and enjoy the world.
It can be especially challenging with kids running around, and then of course the real challenge becomes finding ways to keep them active, engaged, and entertained without too much screen time.
Finding new ideas to keep the kids entertained can be hard, so if the Peppa Pig episodes have all been re-watched, and Harry Potter has already defeated Voldemort twice, then here’s a list of some fun, creative, and eco-friendly arts and crafts courtesy of your good friends here at Blueland.
Make Your Own Low Waste Glue
This activity may not be the most exciting, but it’s fast, it’s easy, and you’ll need it for some of the other crafts on this list!
What you’ll need: flour, water, saucepan, container
-
Step 1: Take a saucepan, put it on the stove, and apply medium heat
-
Step 2: Blend equal parts flour and water, and mix until it’s pancake batter consistency
-
Step 3: Beat the mixture, then pour into the pan
-
Step 4: Constantly stir while the mixture comes to boil
-
Step 5: Let it cool, then get to crafting!
Keep your freshly made glue in a reusable container so you can use it for all your crafts!
Low Waste Toilet Paper Roll Bird Feeder
One thing we all likely have on hand? Empty toilet paper rolls. Who said arts and crafts is for the birds?
What you’ll need: toilet paper roll, vegetable shortening, butter knife or popsicle stick, birdseed, twine, plate
-
Step 1. Use a butter knife or popsicle stick to spread vegetable shortening onto your toilet paper roll
-
Step 2. Roll the toilet paper roll over a plate covered with birdseed
-
Step 3. String a loop of twine through the roll and tie as a loop
-
Step 4. Hang your new bird feeder on a bush, branch, or outside of a window, and watch the birds chow down!
You can also try and identify the birds that stop by. This feeder is proven to work on: Cardinals, Finches, Chickadees, Nuthatches, Sparrows, Grosbeaks, Blue Jays, Titmice, Mourning Doves, and even woodpeckers!
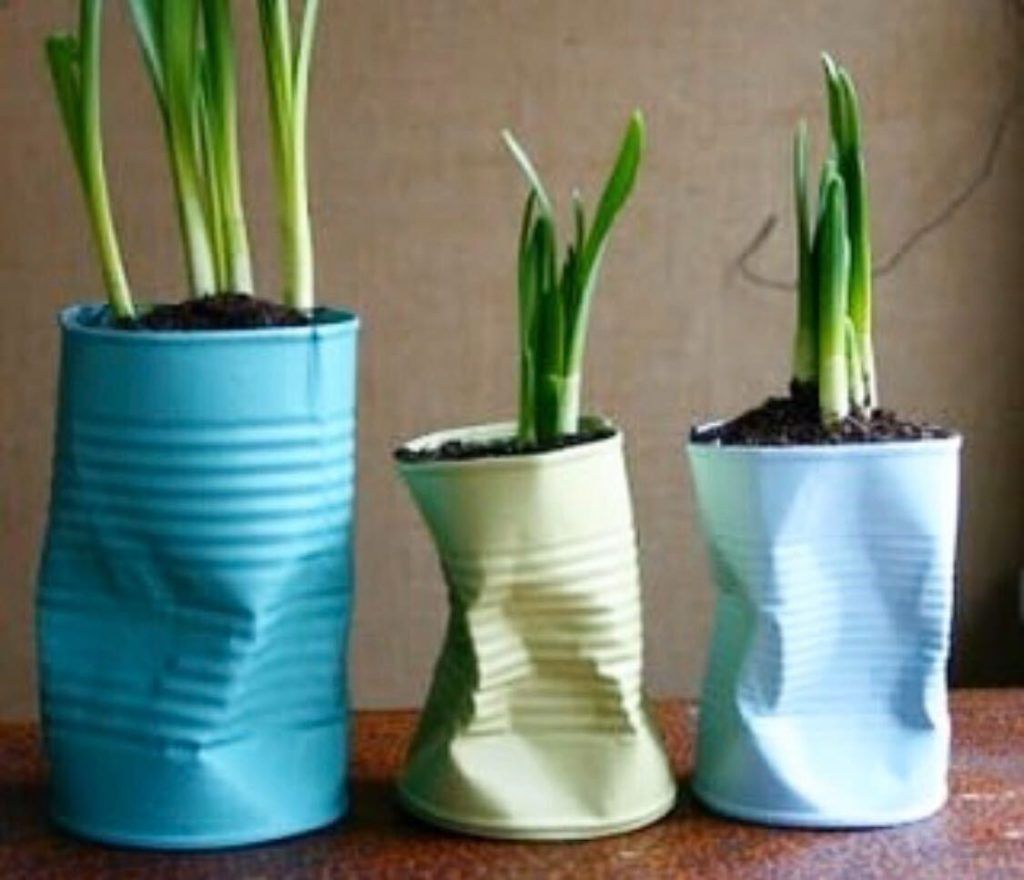
Plastic-Free Tin Can Garden
If you’re anything like us, you stocked up on canned food. If you’re running out of room in recycling bin, no need to worry! You can re-use your tin cans to make an indoor food scrap garden!
What you’ll need: At least one tin can, some potting soil, food scraps from green onions, celery or potatoes.
-
Step 1: Clean out your can! You want to start by rinsing out any food residue from your cans. Be sure to poke a small hole in the bottom so the water can drain out.
-
Step 2: (Optional) If you want, you can decorate your cans before starting your garden. You usually paint over the labels or cover with paper scraps to and label your cans.
-
Step 3: Add soil. Depending on what you choose to grow and the size of the can, you’ll want to fill up around ¾ of the can, leaving room for your plant on top.
-
 Step 4: Choose your food scraps or flowers to plant!
 -
Step 5: Water and watch them grow!
Low waste Pine Cone Owl
It’s adorable. It’s creative. And it’s made entirely with things found in the park!
What you’ll need: At least one pine cone, seeds (like maple or pumpkin), bark, your homemade glue, and small leaves.
-
Step 1. Go on a scavenger hunt/nature walk in the backyard to find these components
-
Step 2. Glue the acorn caps onto the same side of the large pine cone to make the eyes
-
Step 3. Glue a seed between the eyes to make a beak.
-
Step 4. Glue leaves over the eyes to make the famous owl eyebrows.
-
Step 5. Glue two pieces of bark on either side to make the wings
Extra credit: Paint the pieces to give the owl some wacky colored eyes, brows, and wings!
Cardboard Box Shadow Puppets
We know that online shopping has increased, and with that comes lots of extra packaging. While cardboard is recyclable, it’s also sturdy, and a great material for shadow puppets and puppet theaters!
What you’ll need: 2-3 cardboard boxes, one large to make the theater, the others to make puppets. Popsicle sticks or chopsticks for the puppet stands and pencil to trace, and a white piece of paper or thin cloth like a sheet or old pillowcase and a flashlight!
-
Step 1: Design and trace your puppets. You can choose your puppet characters, trace the outline onto cardboard and cut out the puppet shapes.
-
Step 2: Attach the popsicle sticks or chopsticks to the puppets, using your homemade glue or paper tape.
-
Step 3: Make the puppet theater! Take a large cardboard box and trace a rectangle to cut out of the center. Cover the rectangular cut-out with a piece of thin water paper or cloth and attach with glue, push pins or paper clips.
-
Step 4: Set up a lamp or flashlight behind the box so the light shines through the paper or cloth. Test that the light is bright enough by creating a shadow with your hand.
-
Step 5: Put on a puppet show!
These are just some ideas on how to keep crafts low-waste and entertaining while at home! For more eco-friendly tips for kids check out our article on how to stay low waste this school year.
Tags
Read More


Refill is the New Recycle
The perfect way to start cutting out single use plastic from your home.